


FAQ: What is an Image Backup? Why is it needed?
- Imaging is a way of backing up the computer that allows you to store the entire computer, including the operating system and programs, in a single file (an “image”) that can be used to restore the computer to exactly the way it was when the image was made. This is a good way to recover from major hardware failure without having to spend lots of time reinstalling programs, restoring data, etc.
- An image backup created with DiscWizard can only be restored to the exact same computer it was created on.
- To start the Image Backup you will need to open the DiscWizard software and click on the Backup selection.
- Click Add Backup at the bottom left of the window and name your backup so you can identify it later.
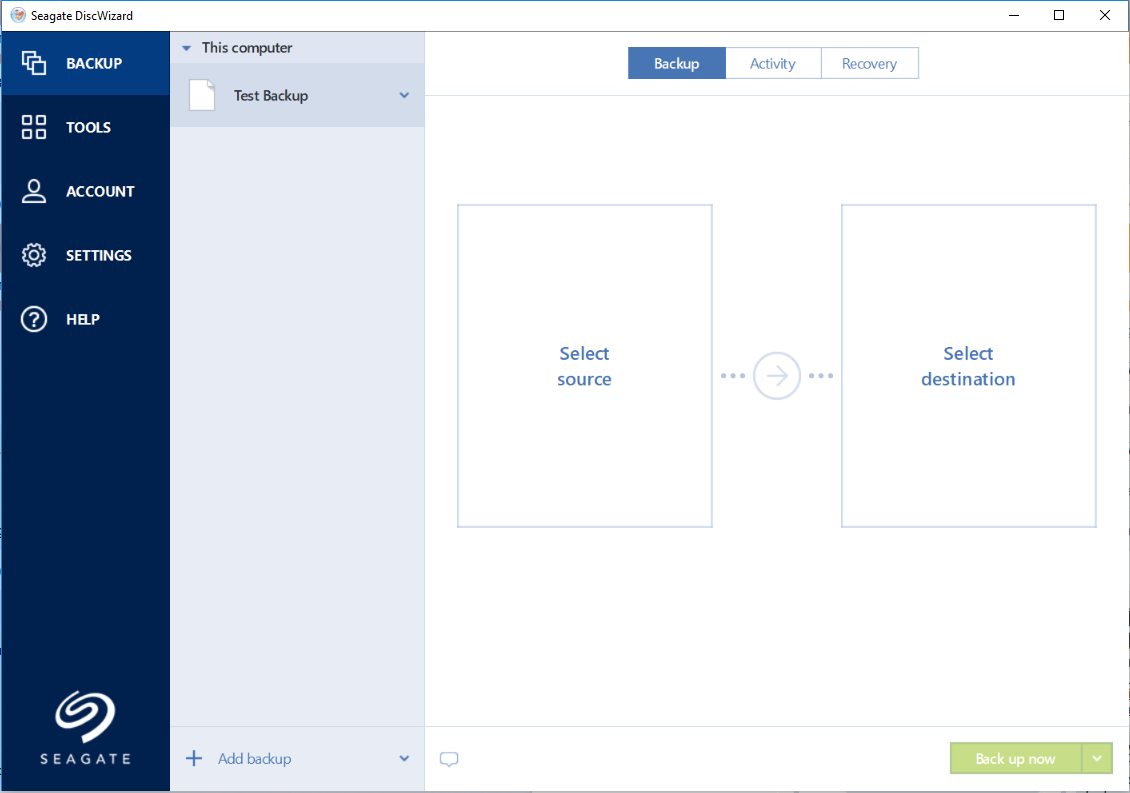
- Click Select source and then click on Entire PC. Next, click on Select destination and choose the external drive where you want to save the image backup.
- Click on Backup Now at the bottom right of the window to prompt the backup to start. The backup will begin and display a status bar.
*Disc Wizard backups are created as a .tib file and the default location is the root of the destination you chose if you did not specify a folder.
*For more information regarding Backup options you can access the built in help guide through the Help selection on the left side of the software.