


FAQ: What is an Image Backup? Why is it needed?
- Imaging is a way of backing up the computer that allows you to store the entire computer, including the operating system and programs, in a single file (an “image”) that can be used to restore the computer to exactly the way it was when the image was made. This is a good way to recover from major hardware failure without having to spend lots of time reinstalling programs, restoring data, etc.
- An image backup created with DiscWizard can only be restored to the exact same computer on which it was created.
* When booting to the DiscWizard CD, you will be prompted to boot normally into your Windows operating system or into DiscWizard. Select DiscWizard.
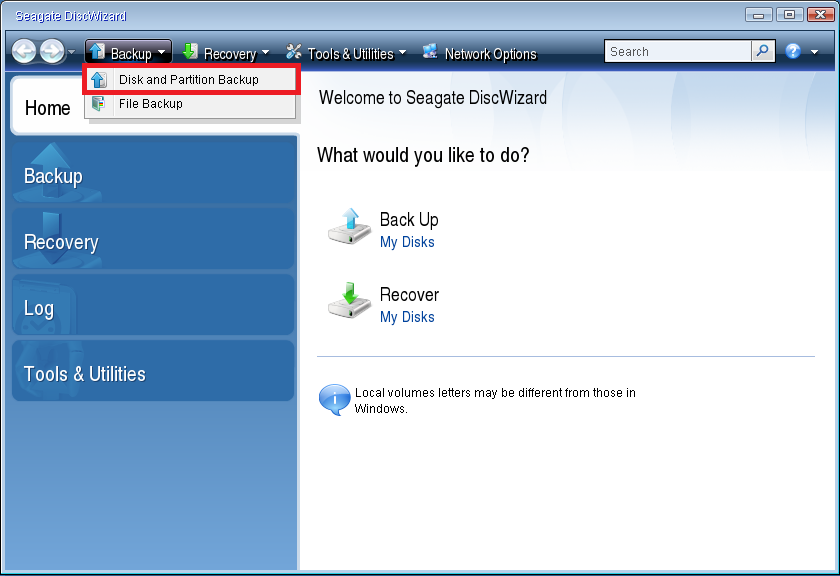
- From the home screen of the DiscWizard software, click Backup/Disc and Partition Backup.
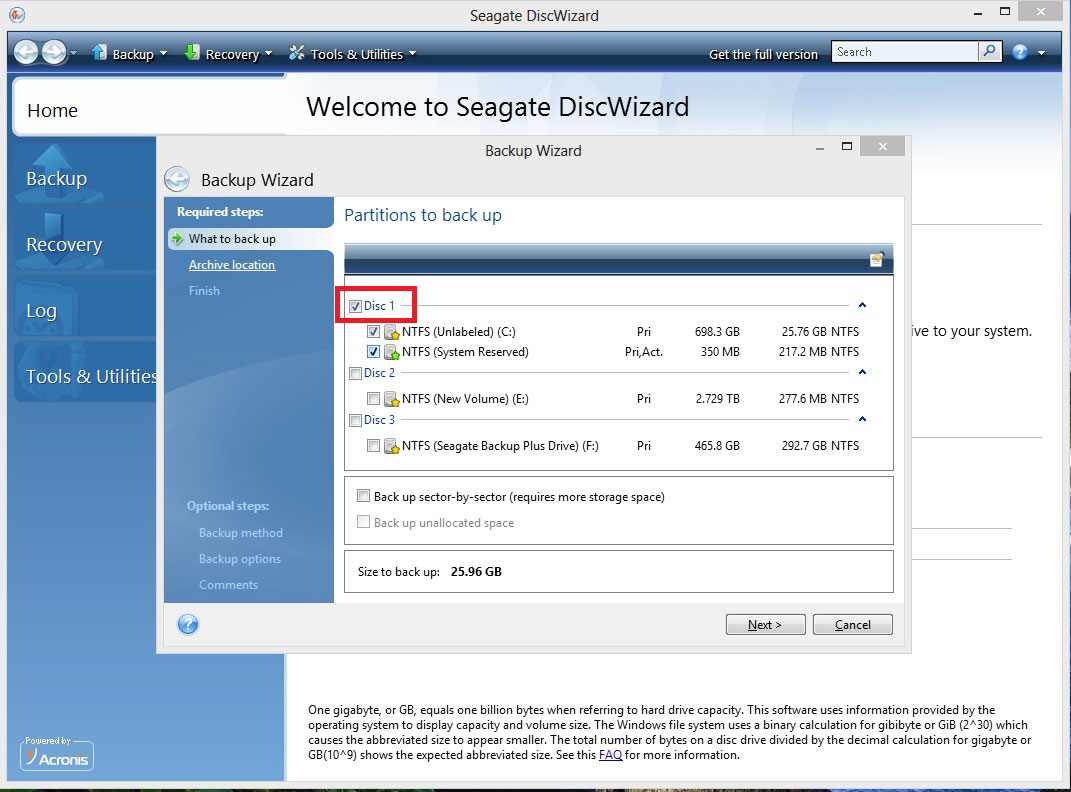
- Be sure to select all partition boxes under the drive of which you want want to create an image. This can be done easily by clicking the Source Disc Box as shown below.
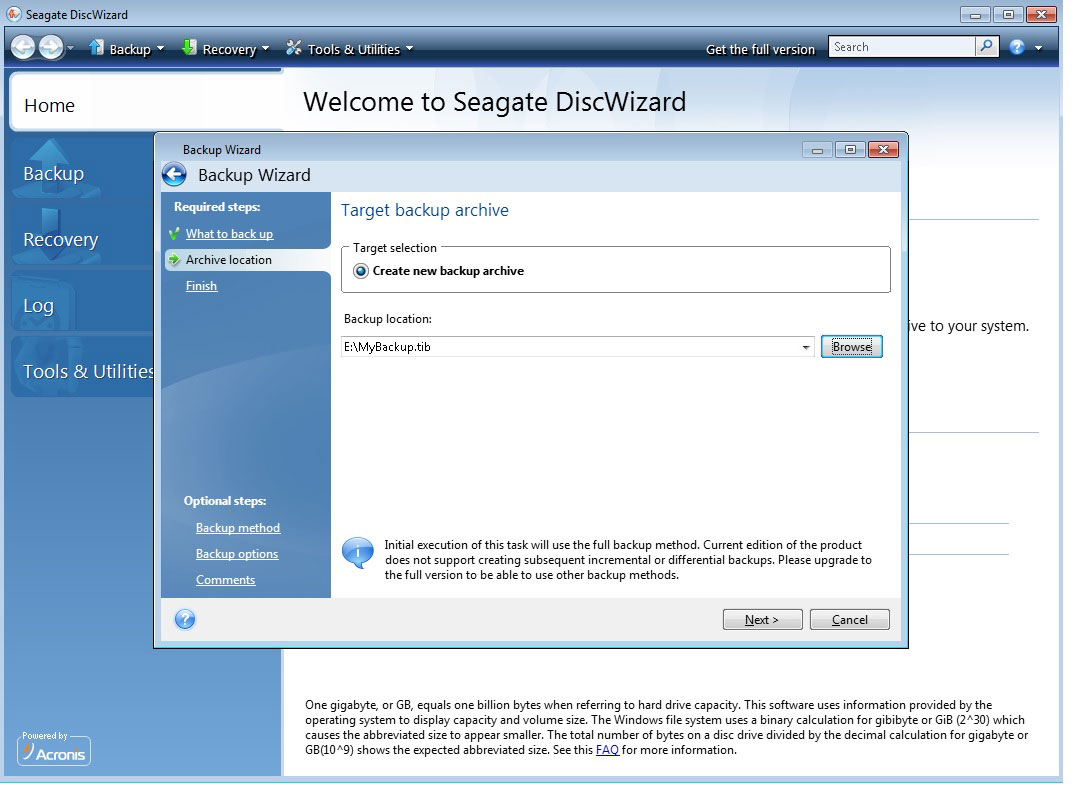
- The default location to save the image will be on the C: drive. To change this, click Browse.
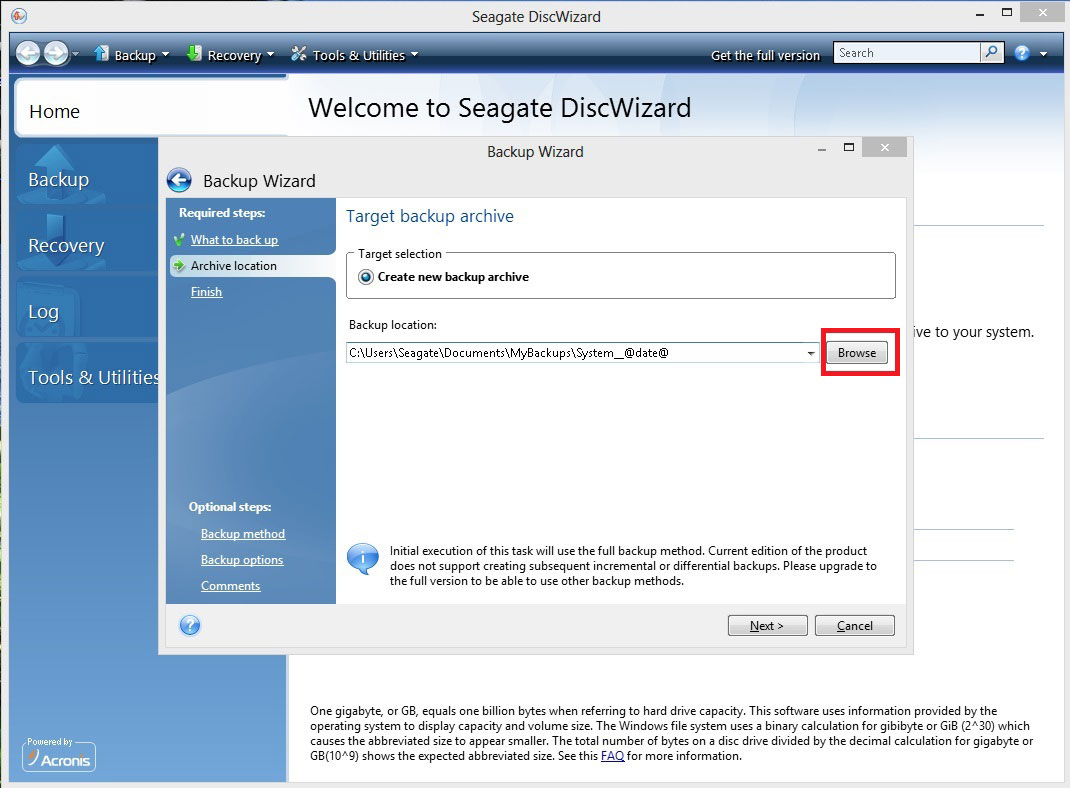
- Then browse for the destination drive under Computer/File Explorer. If you want the image stored in a specific folder on the drive, you can select it here. Otherwise, the image will be stored on the root of the drive. Once the drive or folder has been selected, click Generate Name, then click OK.
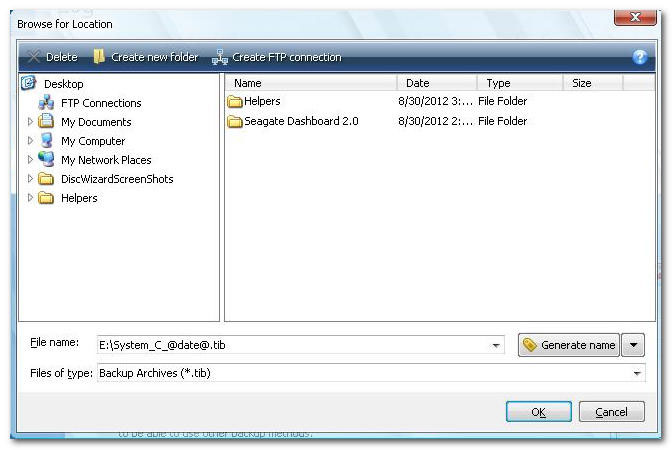
- Notice that the Backup Location has been changed to the destination that was selected. Click Next.
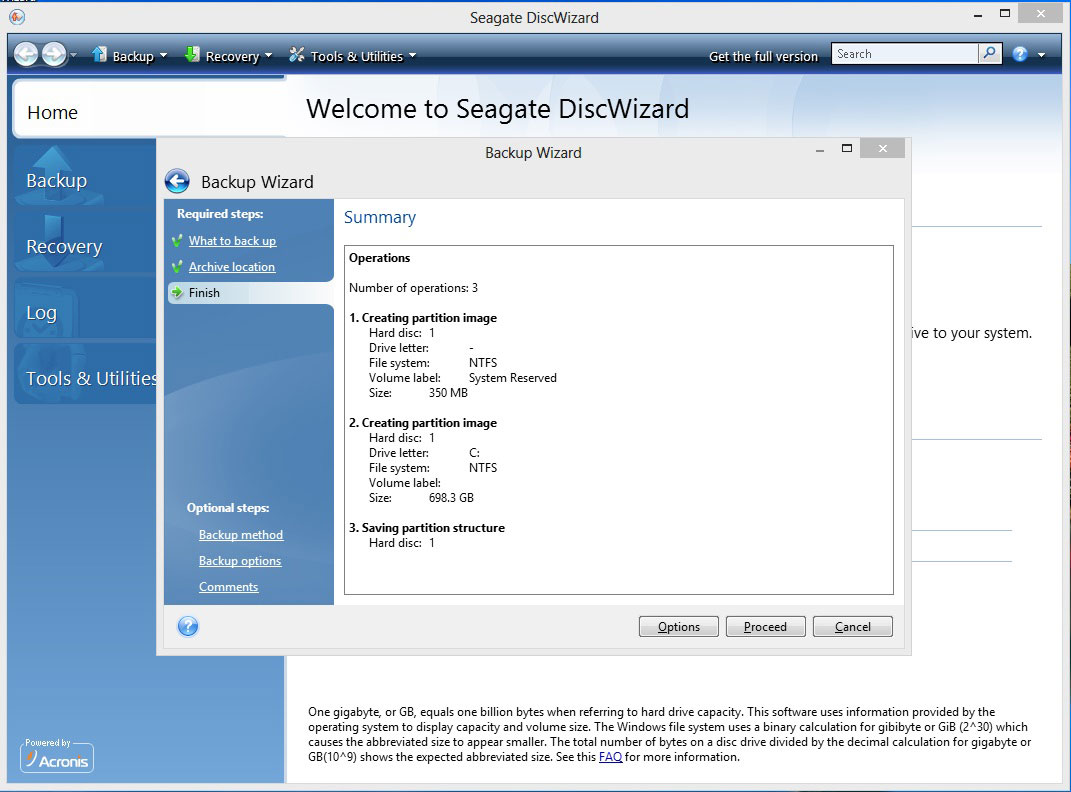
- At the summary screen, click Proceed.
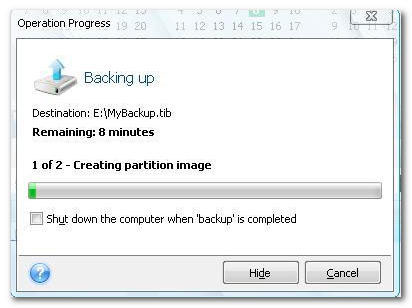
- At this point, the Operation Progress screen appears. Once it has completed, you should be able to see the image file (.TIB) in the location you selected as the destination.
- Once the Image backup is complete, remove the DiscWizard Bootable Media CD.